Micromax A106 Unite 2 has 0.89 GB for app storage. This low storage can be increased up to 6 GB by flashing repartition mods.This mod is created for Micromax A106 Unite 2 (MT6582) and may not work in other phonesThis repartition mod is 100% safe and has been tested by thousands of Unite 2 users.
You don’t need a rooted phone for repartition. Factory reset is required after flashing EBRs so please make nandroid backup or titanium backup if you want to restore data. Install App Backup and Restore from play store to backup apks. Move all data like pictures, videos and other files from internal sd card to external sd card or pen drive.
Note: 4 GB model supports maximum 2.5 GB for apps. Don’t flash more than 2.5 GB in 4 GB model.
Internal memory = Total ROM – ( 1.44 GB + apps memory)If ROM is 8 GB and phone memory is 2.5 GB then internal memory will be 4 GB.
ROOT IS REQUIRED AND NEED CUSTOM RECOVERY
Read Here : How to Root Micromax Unite 2 Without PC For KitKat and Lollipop ?
Steps to repartition:
Flash custom recovery.
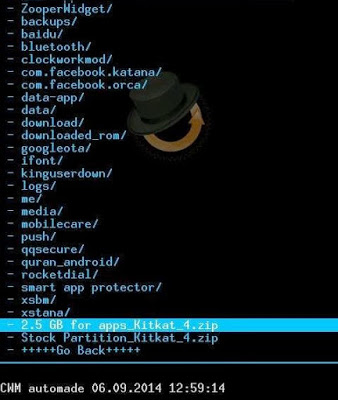
Keep downloaded repartition zip file in external SD card.
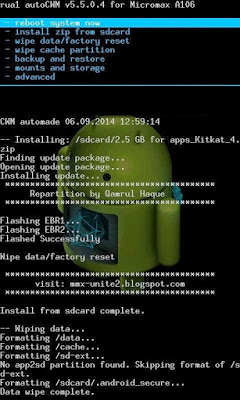
Switch off phone and press vol up + vol down + power button to reboot to recovery.
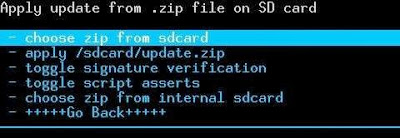
In CWM recovery, press vol down to select install zip from sdcard then press power button to confirm selection

Select choose zip from sdcard then press power button

Select downloaded repartition zip file then press power button

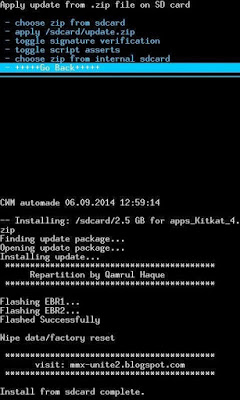
Select Yes – Install then press power button

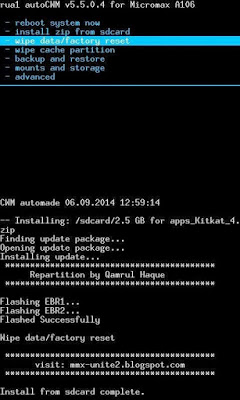
After successful flashing of EBR1 and EBR2 press vol down to select Go Back then press power button

Press vol down to select wipe data/factory reset then press power button

Press vol down to select Yes — delete all user data then press power button

Go to advanced menu and wipe dalvik cache

Restart phone after wiping dalvik cache
After restart if you see Encryption unsuccessful message then tap Reset phone. If tapping reset phone doesn’t work then reinsert battery and press vol up + vol down + power button to reboot to recovery and repeat steps 9, 10 and 11.
Credits:
Qamrul Haque


